experiments continued

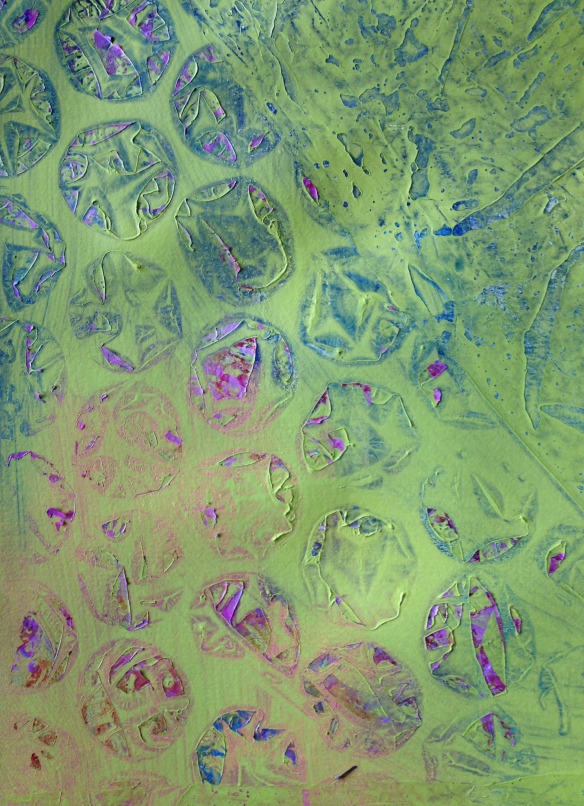
Having liked the results written up in my post, experiments with plastic, I decided to try different combinations of black and bright colours.

Black gesso and black acrylic under brights (magenta vermillion and cadmium yellow medium).

Black acrylic and India ink as the top layer over the bright colours.

In each case (black under/black over) I used the medium at full viscosity or watered down.  I also used the magazine-wrap plastic as well as cling film.

The results were similar to before however the most effective, in my opinion, was when I used a diluted top coat as more of the previous layer shows through.

Diluted India ink over bright acrylics and magazine wrap plastic . . . I forgot to dilute it prior to application so I spritzed it with water. Wendy @ Late Start Studio

Diluted India ink over bright acrylics and magazine wrap plastic . . . I forgot to dilute it before application so I spritzed it with water.
Wendy @ Late Start Studio

Bright acrylic over black acrylic and cling film. Wendy @ Late Start Studio

Diluted bright acrylic over black acrylic and cling film.
Wendy @ Late Start Studio

Brights over black gesso and magazine-wrap plastic. Wendy @ Late Start Studio

Brights over black gesso and magazine-wrap plastic. Unfortuantely I put the black smudge on after with my grubby fingers.
Wendy @ Late Start Studio

Even the magazine wrap plastic looked interesting after I'd used both sides . . . I'll probably use it again knowing that it will leave remants of colour behind. Wendy @ Late Start Studio

Even the magazine wrap plastic looked interesting after I’d used both sides . . . I’ll probably use it again knowing that it will leave remnants of colour behind.  Hmmm . . . I wonder if I can stick down with a matt gel? 
Wendy @ Late Start Studio

I used Atelier Interactive acrylics for these samples. I bought them myself however if Atelier wants to subsidise my play experiments that would be lovely!

And now that my curiosity has been satisfied it’s time to put all my paints away otherwise I won’t get some presents made and of course I can’t tell you about those because my family read this blog.  Maybe I’ll lay our some cardboard first and make gift tags . . . I’m thinking of white under and over pastels.  So just a little more playtime perhaps or is this perseverance beginning to blossom?

experiments with plastic

In the last post I wondered how the thickness of plastic placed over wet paint and allowed to dry, would affect the texture.  I also wondered how the thickness of the paint would affect the result.  Two variables – two experiments.

Step one was to apply gesso to some sketch paper and allow it to dry so I would have a non-porous base layer.  After that I applied a background of deep turquoise and magenta acrylic paint.   When the background was dry I used some lime acrylic paint thinned with water on one sheet and straight from the tube on the second.

The plastics I used were cling film (Glad Wrap, Saran Wrap) and the plastic that comes wrapped around magazines received through the post (there’s nothing like free resources).  I also used re-used some 25 mm or 1 inch bubble-wrap.

Diluted top coat, magazine-wrap plastic. Wendy @ Late Start Studio

1. Diluted top coat, magazine-wrap plastic.  The variation in the background looks especially good to me.
Wendy @ Late Start Studio

Diluted top coat, cling film. Wendy @ Late Start Studio

2. Diluted top coat, cling film.
Wendy @ Late Start Studio

Diluted top coat, bubble wrap. Wendy @ Late Start Studio

3. Diluted top coat, re-used bubble wrap. I just love the remnants of paint that have been left behind.  And again, the transparent top-coat allows the variations of the background to show through
Wendy @ Late Start Studio

Full viscosity, magazine wrap. Wendy @ Late Start Studio

4. Full viscosity paint top coat, magazine-wrap plastic.
Wendy @ Late Start Studio

Full viscosty top coat, cling film. Wendy @ Late Start Studio Wendy @ Late Start Studio

5. Full viscosity top coat, cling film.
Wendy @ Late Start Studio

Full viscosity top coat, clean bubble wrap. Wendy @ Late Start Studio

6. Full viscosity top coat, clean bubble wrap.
Wendy @ Late Start Studio

Full viscosity top coat, reused bubble-wrap

7. Full viscosity top coat, re-used bubble wrap

A cose up of the previous sample. Wendy @ Late Start Studio

8. A close up from the previous sample.
Wendy @ Late Start Studio

I liked the effect of both parts of the experiment, I really liked how the re-used bubble wrap left remnants of paint behind.  The diluted paint gave a lovely transparent effect with an opaque paint . . . the first three images have to be my favourites.   Whether I use diluted paint or at full strength would depend on what effect I wanted to make.

As to the choice of plastic?  The thinner the plastic the finer the details and the more likelihood the results can be controlled to some extent . . . controlling cling film is difficult enough at the best of times however by twisting it slightly, bunching it up after it was laid on the wet paint, I could manage a degree of control over the number of marks but very little over where they were.  I thought it would be rather wonderful to be able to manipulate it to form the veins of a leaf.

By removing the plastic just before it was dry it would be possible to soften the edges of the marks but right now I’m thinking about colour combinations; neon over black, black over brights, various earth tones with a transparent top-coat . . . hmmm, this could keep me busy.

Did I have fun? Was it worth while?  Will I continue exploring? Will I put samples in a journal? Damn right!